I got my 1977 Jeep J-10 pickup back from the restoration shop near the end of last year. While it is in good mechanical shape, I still have to fix some things that were ‘out of scope’ for their work. I also need to install some aftermarket and improved parts, and generally put my personal stamp on it before it goes into my normal driving rotation. Between the weather and my other commitments, it has been slow going. I can only work on it when the weather permits and when I have some free time. Getting those two conditions to align has been difficult so far, but I expect that it’ll get better when spring comes.
With a handful of small exceptions, it’s easy to get parts for the front half of the J-10. Although the Jeep trucks never sold particularly well, tons of parts are interchangeable with those for the other SJ chassis Jeeps, including the much better selling Cherokees and Wagoneers. The Wagoneer was in production for an incredible twenty-eight years—from 1963 to 1991—and many parts were the same for the entire run. There are tons of original parts out there, and there are enough SJs out there that many OEM-equivalent parts are still being made brand new.
But that doesn’t apply to the rear half of the J-series pickups. The undercarriage has a lot of commonality with the other SJs, but everything else is truck-specific and hard to find. There were only a fraction as many Gladiator, J-10, and J-20 trucks produced as there were Cherokees and Wagoneers. To make matters worse, the trucks had three different bed styles over their run (‘Townside,’ ‘Thriftside,” and “Stake Bed”) in two different bed lengths (short and long), so parts aren’t always interchangeable even between the trucks. And parts of the beds, especially the tailgates and rear bumpers, were very prone to rusting themselves into oblivion even if they were well taken care of.
In other words, few J-10 bed and tailgate parts existed in the first place, only a fraction of them are compatible with my particular J-10, and only a small fraction of them have survived.
My truck came with a tailgate, which is a rarity in and of itself, but the tailgate handle and handle mount had been lost. It was still usable . . . you just had to grab the mechanism and pull it to the right to open the tailgate. But it was pretty ugly. Just a big, gaping hole in the back of my truck.
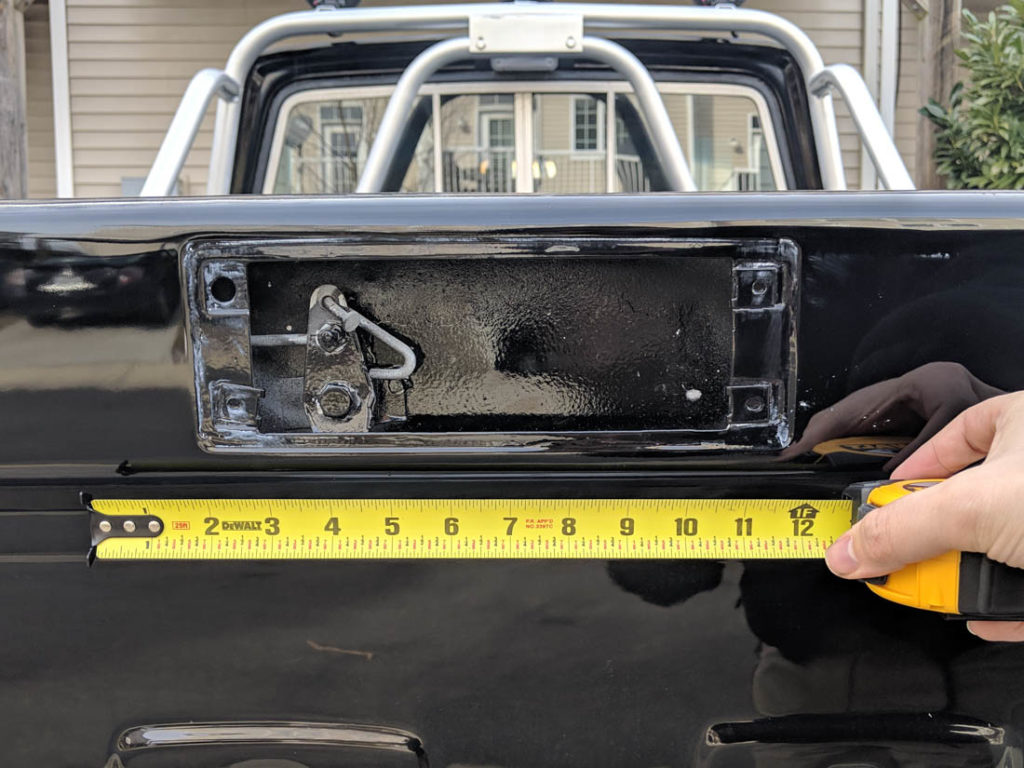
Missing Part 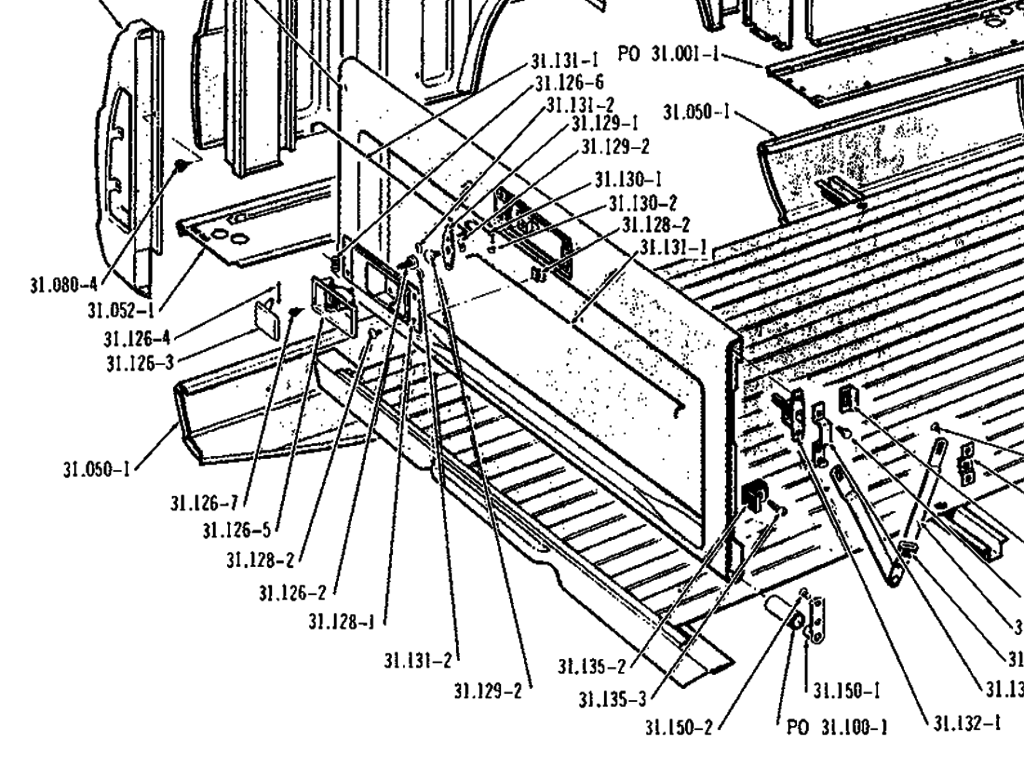
Jeep Diagram
Oddly enough, the tailgate handles are pretty easy to find, because they were just repurposed AMC passenger-side door handles. Almost every AMC passenger car from the mid ’70s well into the ’80s came with at least one. The one I ended up getting on EBay came, I think, from a junked AMC Spirit. But the mounting plate that the handle sits in is unique to the “Townside” style bed on J-10s and J-20s from the late ’70s and into the ’80s. It’s a rare part of a rare part of a rare truck.
After months of searching, I was unable to find anybody who both had the part and was willing to sell it (except one who was willing to sell me a whole tailgate for well over $1,000).
So I started thinking that a simple part like this should be pretty easy to have custom made. I mean, it’s just a flat piece of metal with four holes in the corners, a little decorative rounded-rectangle extruding out, and a cut-out for the handle to sit in. How hard could it be to just . . . make one? So thus began my first foray into car part manufacturing.
The First Prototype
To keep costs down, especially in the prototyping phase, I decided to have the part 3D printed in durable acrylonitrile butadiene styrene (ABS) plastic. I did a bunch of measurements, designed the part in FreeCAD, printed out some to-scale paper versions to check and adjust the size, tweaked and tweaked some more, made a nice render of how it would look, and then sent it off for printing through Hubs (formerly 3DHubs).
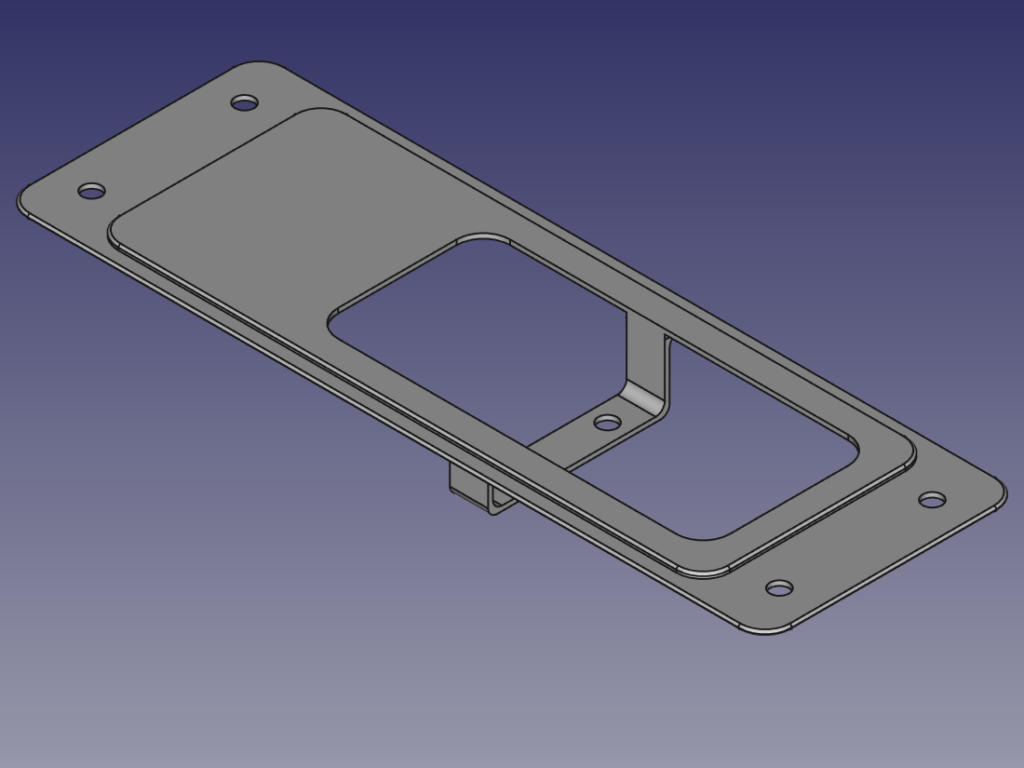
Isometric View 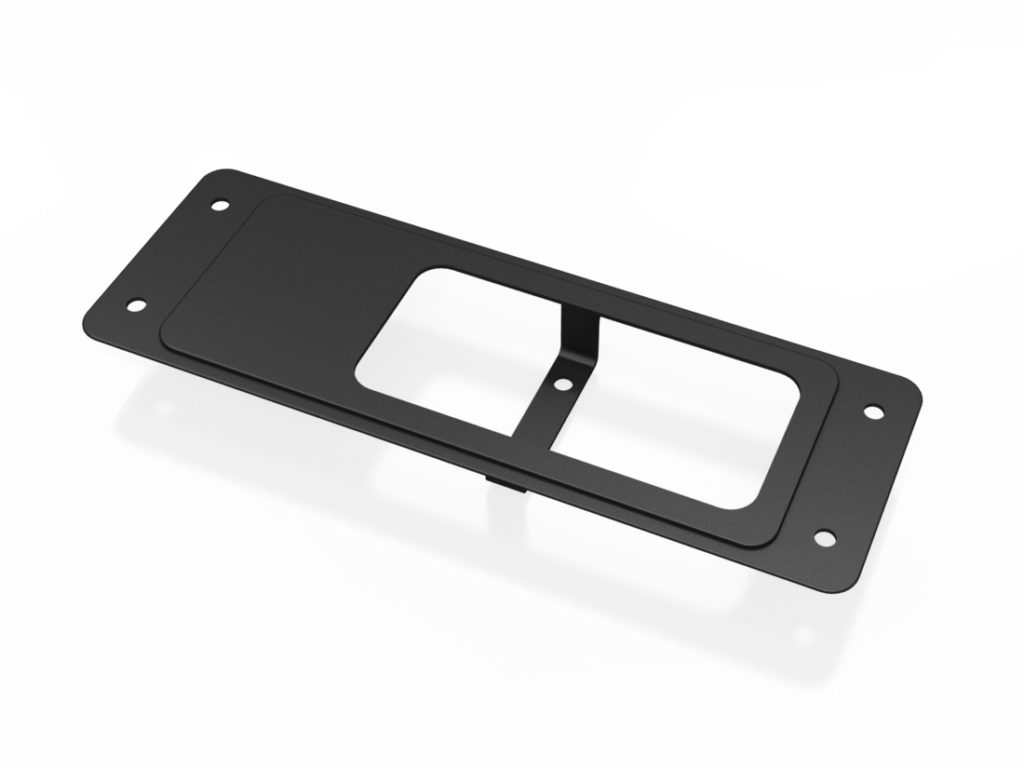
3D Render 
3D Print
Yeah, that didn’t quite come out the way I expected.
As soon as I opened the box I noticed that the finish on the top was pretty ugly and rough. The reason for this is that it was printed ‘upside down,’ which meant that the dissoluble scaffolding on the bottom of the print affected the side that needed to look good. I could sand it down and manually finish it if needed, but it wasn’t worth it . . . because there were some more serious design problems.
First, I had designed it way too thin and flimsy to stand up to the kind of work it needed to do. So much for cost-cutting. Second, the handle didn’t quite fit into the cutout . . . it was just a fraction of an inch too narrow. Third, the size of the whole part ended up being a bit too narrow and the screw holes didn’t line up with the mount points in the tailgate.
That’s okay; I’m learning. Back to FreeCAD.
The Second Prototype
I fixed the sizes and thickened up and toughened up the whole design. More to-scale printouts, more tweaks and adjustments, more 3D renders, and finally back to Hubs for a new print. I did it in ABS plastic again, but this time I specified the orientation for printing so the ugly scaffolded part would be on the bottom where its ugliness wouldn’t matter after installation.
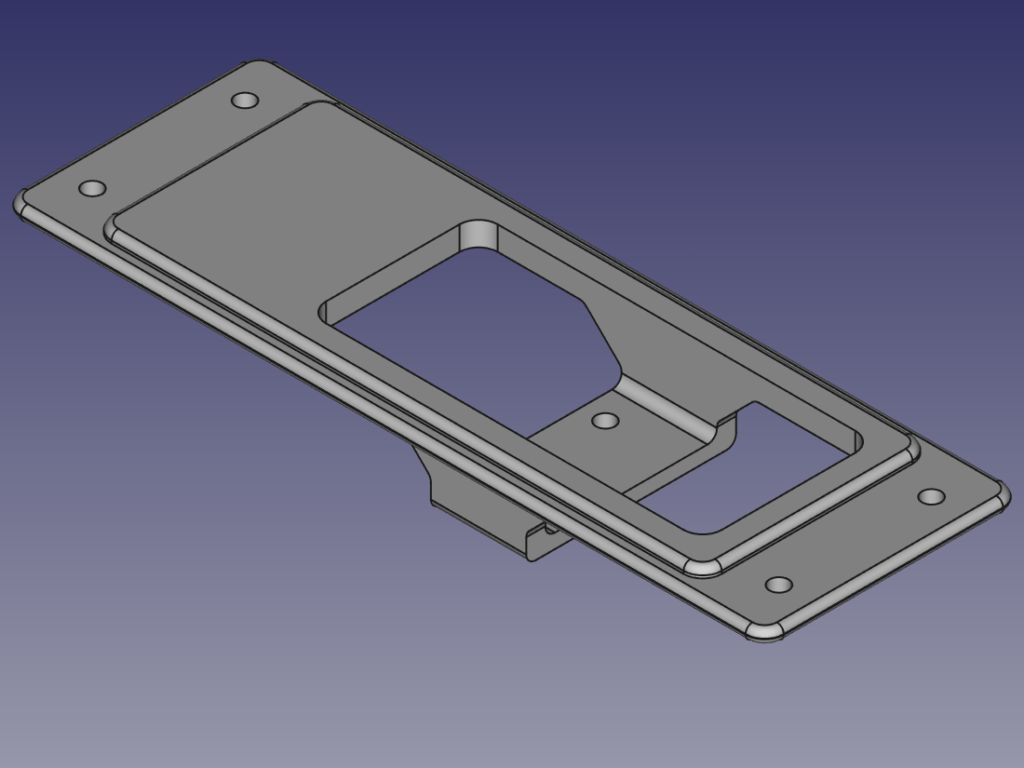
Isometric View 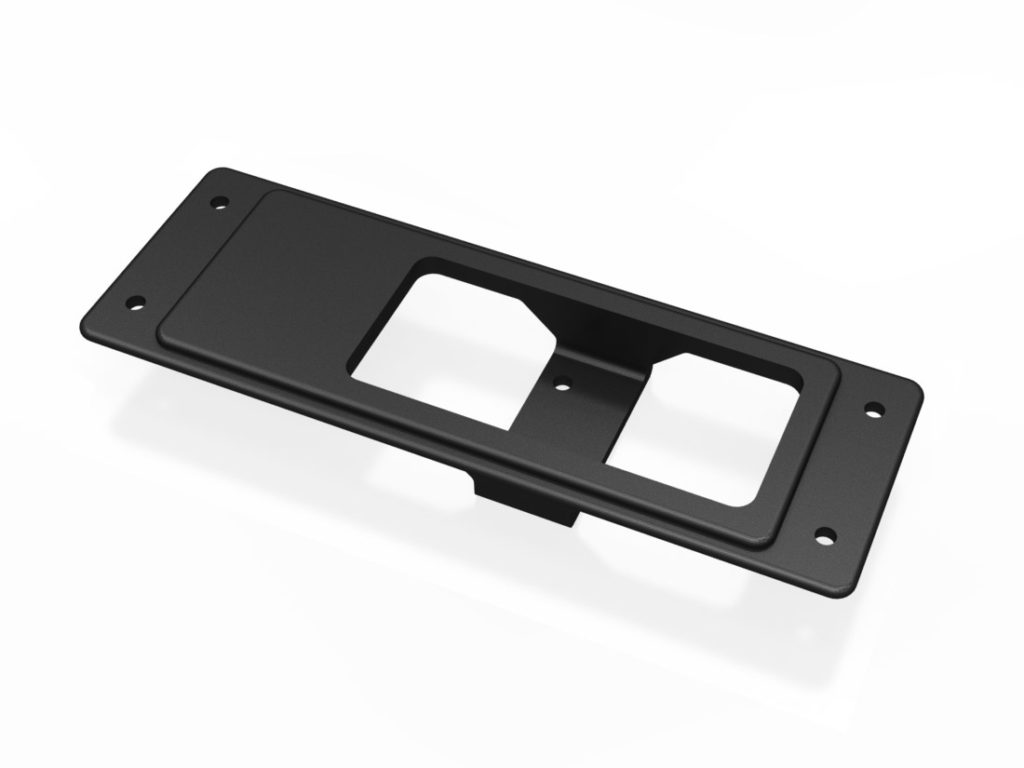
3D Render 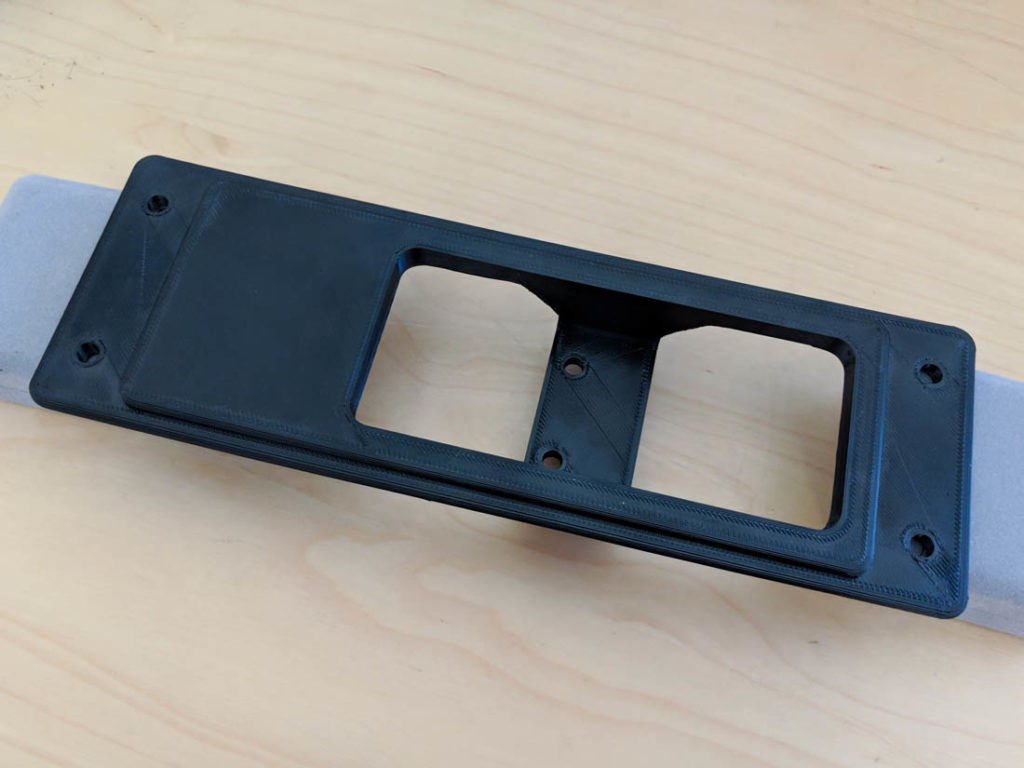
3D Print
Now that’s more like it.
The finish is still a bit messy, but that’s just par for the course with 3D printing. It’s good enough for now, and if it bothers me later I can apply a vapor treatment or do some sanding. But now was the moment of truth. Would the handle fit? Would the whole assembly mount properly on the tailgate? Would it actually work?
Installation
The first test was to install the vintage AMC handle. There was a very slight misalignment, which I’ve noted in case I need to run another print, but it wasn’t enough to stop it from fitting. Good to go.
The next test was the real moment of truth . . . would the combined handle and handle mount assembly mount correctly on the truck? Sure enough, It did.
I had to use some wire to make the connection between the handle and the latch mechanism, since whatever connected them originally is no longer present. I’m not totally confident about how well that will hold up to long-term use, but it will be easy to replace with something else later so I’m not too worried about it. If the wire breaks or dislodges, I just have to unscrew the plate to get back there.
Regardless . . . the big gaping hole on the back of my truck is filled . . . with a replacement part that I designed myself . . . which is pretty awesome.
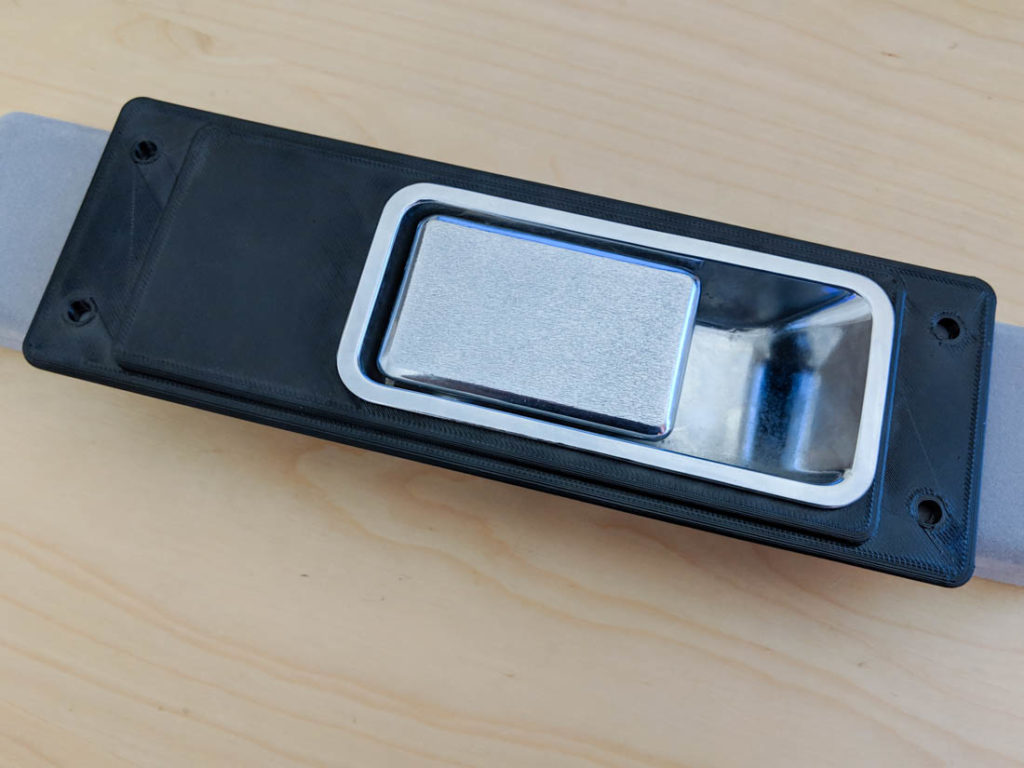
Handle Installed 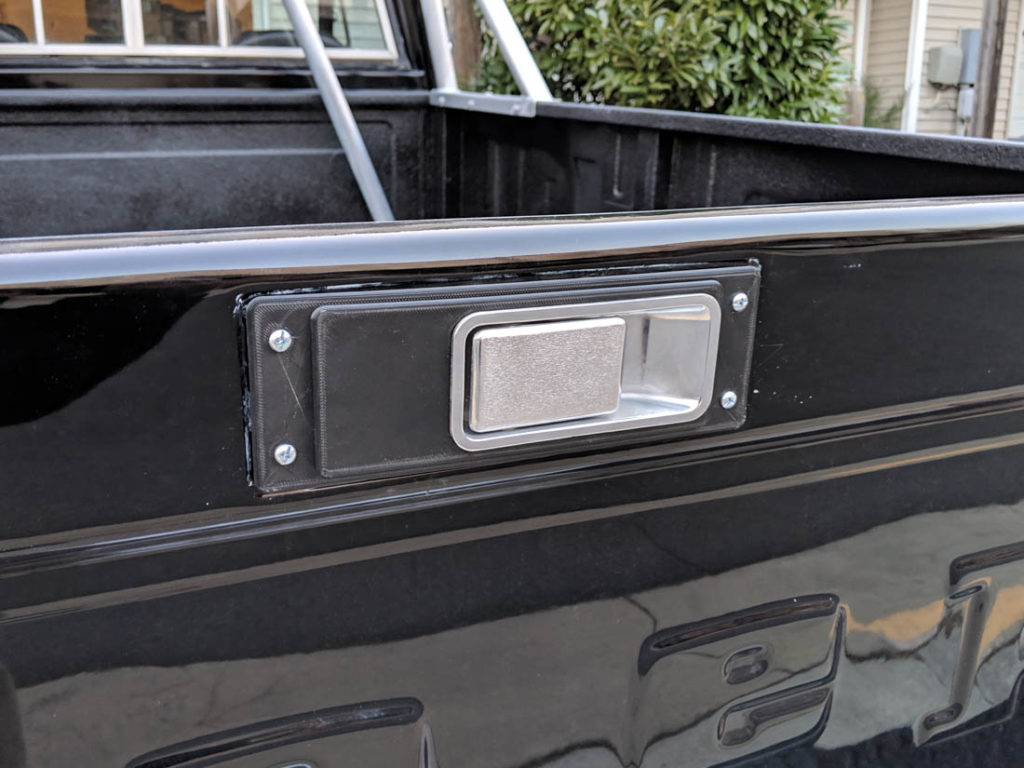
Assembly Installed
What’s Next
Now, on to stress testing. I need to see how the part holds up to real-world use. It’s a pretty tough design made of a pretty tough material so I’m cautiously optimistic that I won’t have to reproduce it in metal, which would be much more expensive. I’ll do it if I need to though. Even if the plastic part doesn’t hold up, it’s a proof of concept and validates the fit and function.
I’m also thinking about what kind of demand there might be for doing a real production run. I still need to do some more research on that front. I think most people who have a tailgate already have this part . . . so maybe the real demand in the niche market of Jeep SJ chassis truck owners would be for complete reproduction tailgates. That would be a much bigger (and much more complex) project. . . .
Ed. Note, January 21, 2022: 3DHubs is now Hubs. At the request of the company, references and links to 3DHubs have been updated to refer to Hubs.
